

Copics - Hex Chart, Swatch, Colour Combos, Storage
This post explains about Copic markers - the types of Copic markers, use of a hex chart, swatching my Copic colour combinations, Copic marker and refills storage as well as some colouring with Copics. I also share the Copic-friendly cards and inks that I use.
Check out the video below.
Copic Marker Types
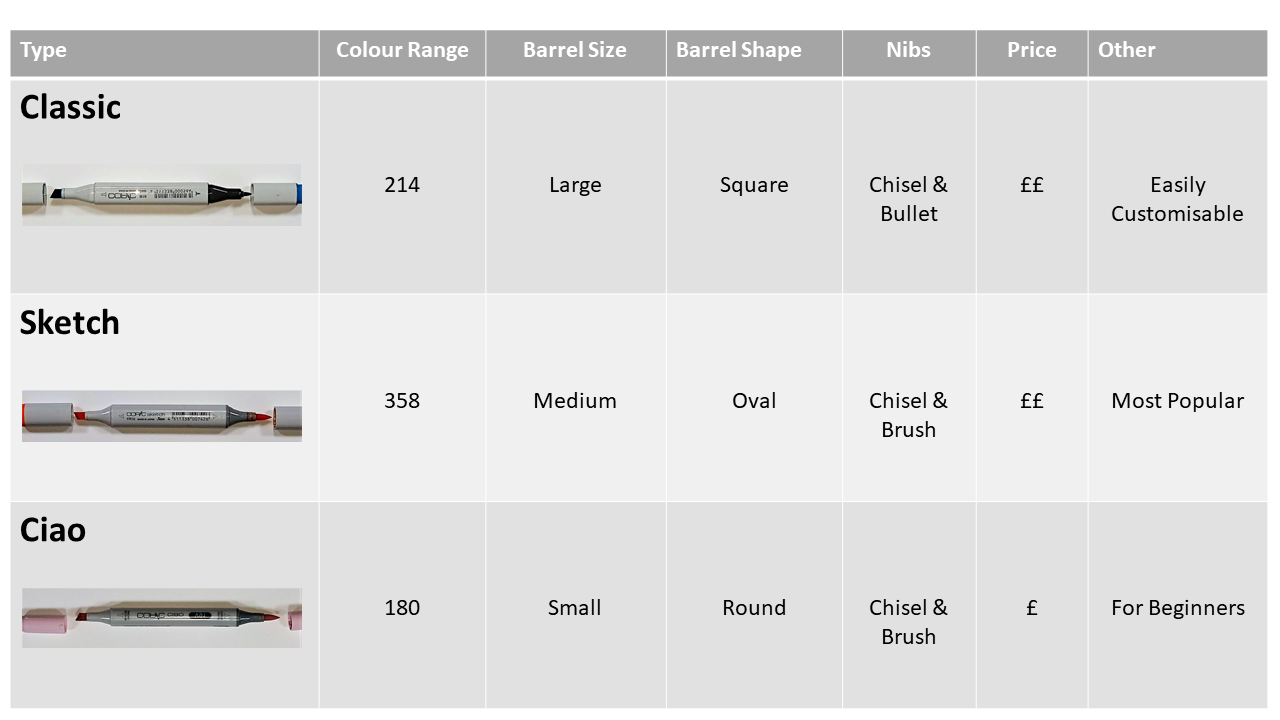
The Classic Copic marker has the largest ink barrel which does not require frequent refills, but the lack of a brush nib does not make it the Copic marker of choice for me. The bullet nib can be exchanged for a brush nib but it’s not a cost-effective way to have a brush marker. There are seven different types of nibs that can be exhanged for the nibs on the Classic Copic marker.
The Sketch Copic marker has a medium ink barrel and has the brush nib that I use all the time. Nibs for the markers can be switched out when they become worn. I remove the chisel tip when refilling as the brush tip can be damaged more easily when using tweezers to remove the nib. Sketch Copic markers are the most popular of the Copic markers due to its largest colour range of 358.
The Ciao Copic marker has a small ink barrel and will require more frequent refills and it also has a brush nib that use the most. This marker has the lowest price point of the Copic markers and thus great for beginners. The 180 colours is the smallest colour range of the Copic markers, though 180 colour is a good range for a start and additional colours (if you want more colours) can be acquired from the Sketch Copic marker colour range.
Where to buy Copic Markers & Copic Refills?
I bought my Copic Markers online from Cult Pens UK and the bulk of my Copic Refills from Art Friends Singapore. Please note that these are NOT affiliate links - just the vendors that I use. If you have a different Copics vendor that’s priced competitively, please include link in comments below.
Hex Chart
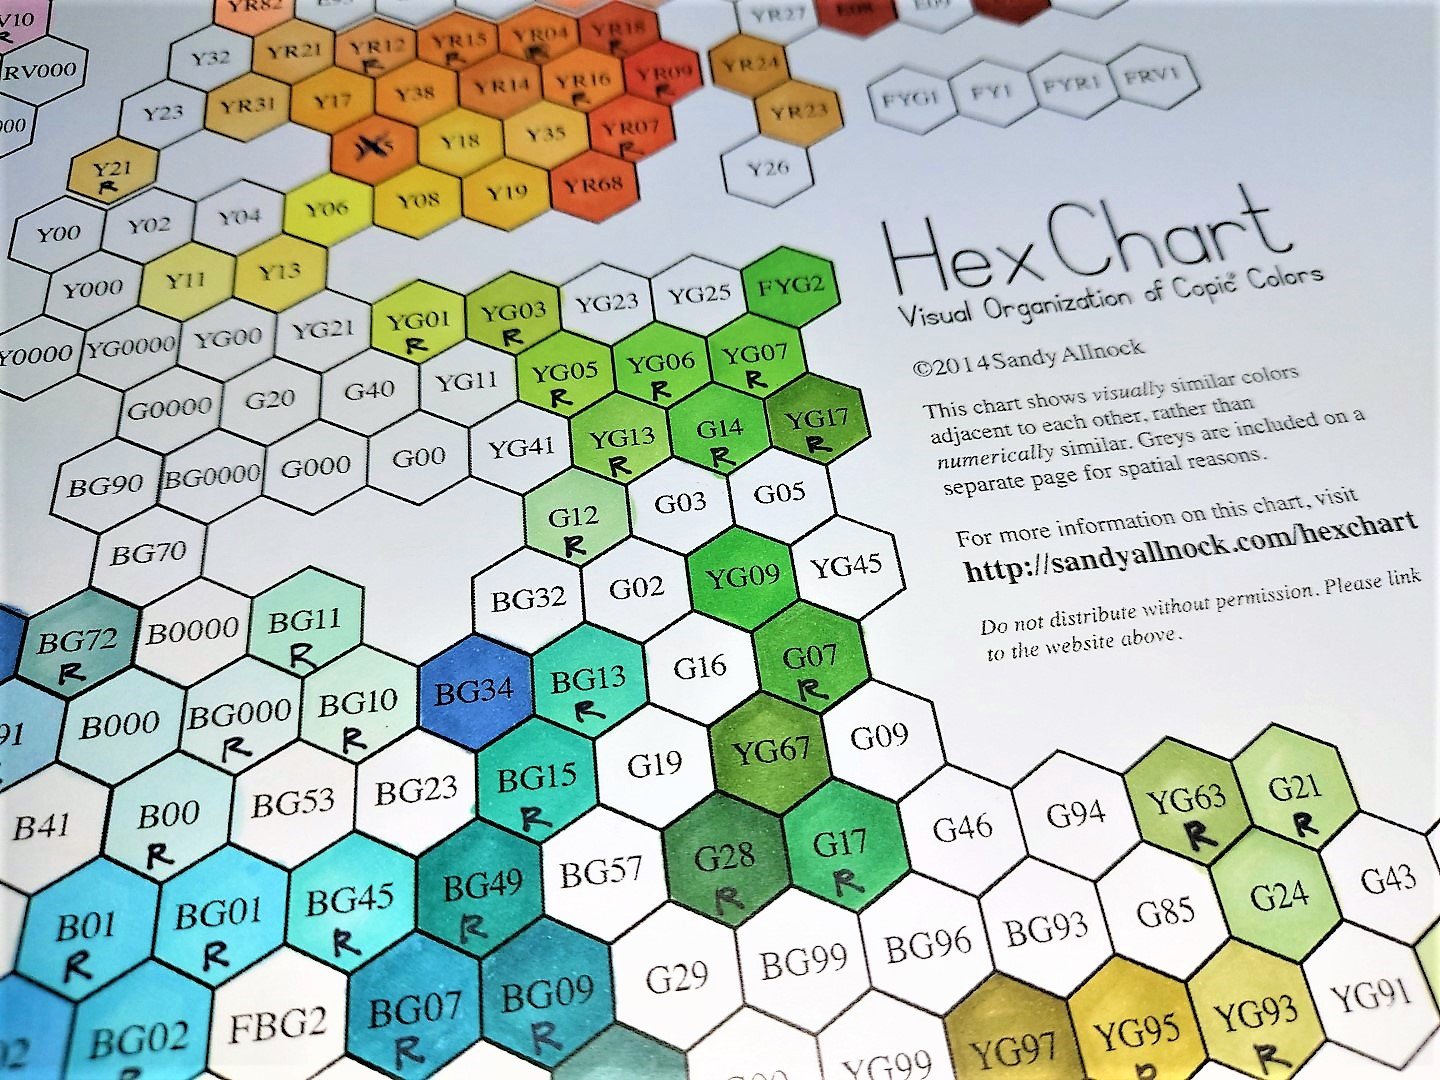
The Hex Chart was compiled by Sandy Allnock and can be purchased here. It is so worth it to get one as it shows visually similar colours adjacent to each other, rather than numerically similar. There is a separate page for greys due to spatial reasons. I mark a ‘R’ on the marker colours that I have a refill.
I use the Hex Chart to keep track of the Copic colours that I have and annotate a ‘R’ on the coloured hex to note the Copic refills that I have. It also allows me to see the colours that go together. It is important to print the Hex Chart on an appropriate card so the Copic colours you see are a true representation of the colour. I printed my Hex Chart on Spectrum Noir Ultra Smooth Premium White cardstock.
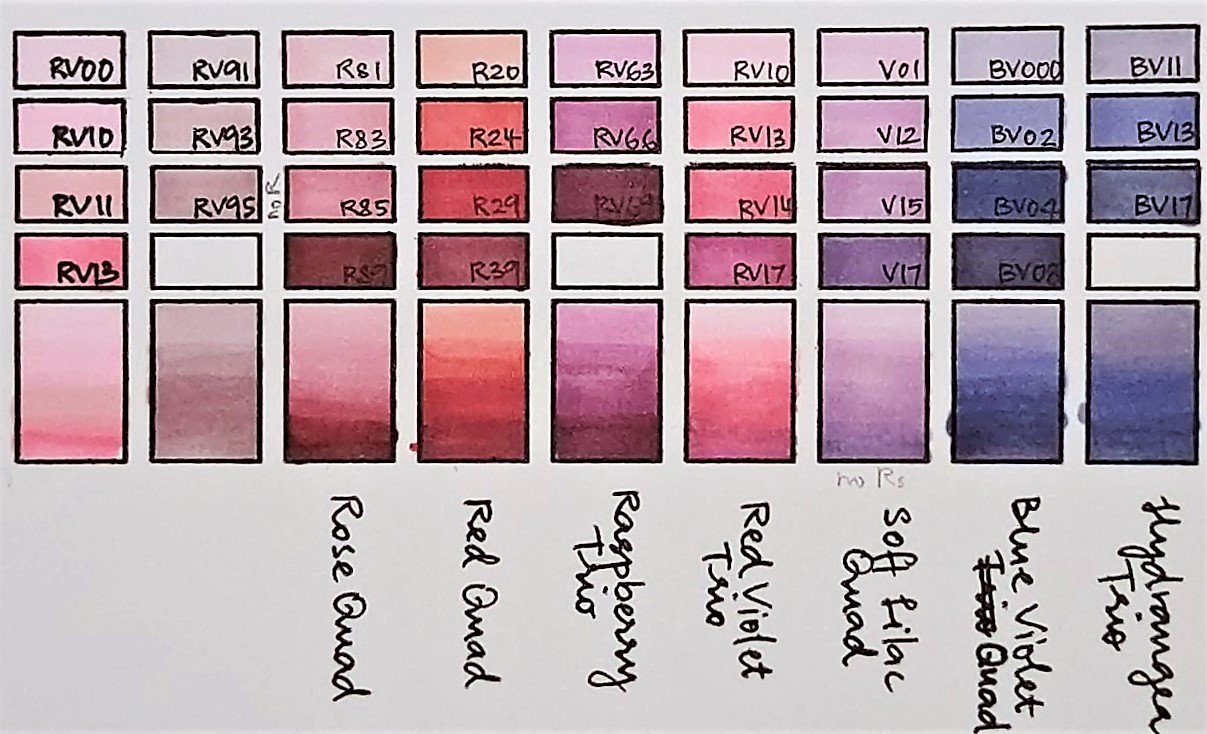
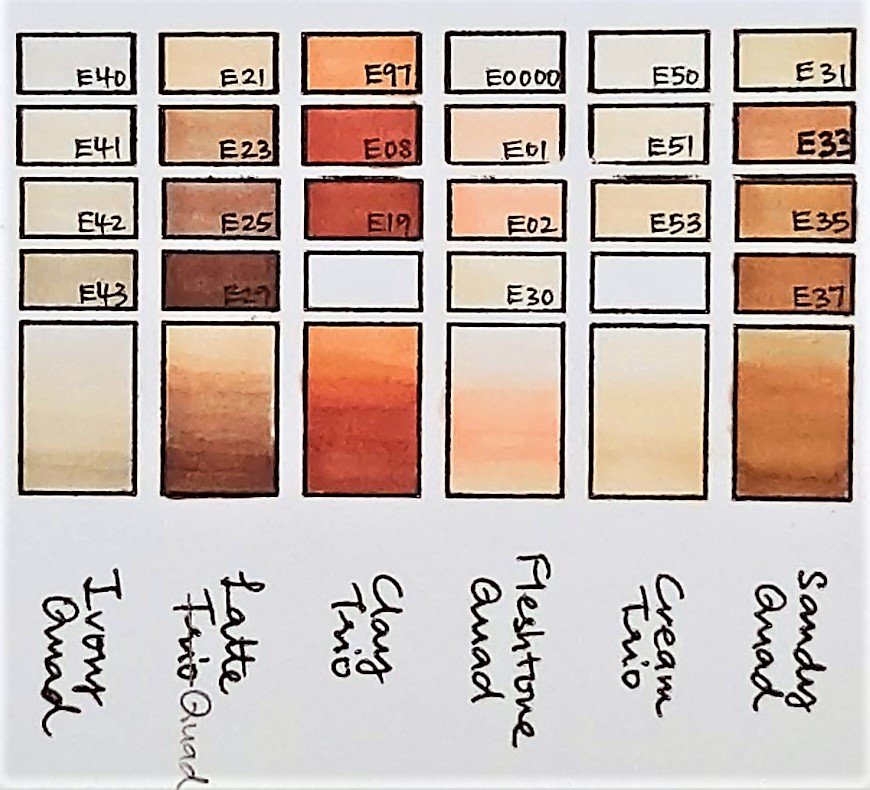
Swatching
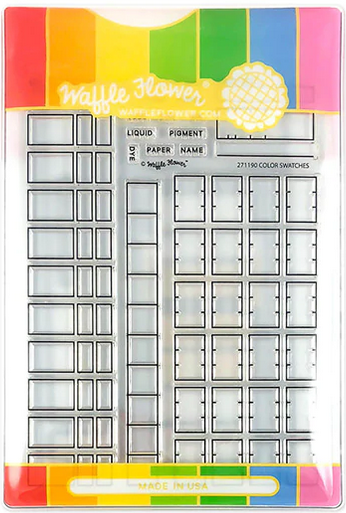
I love using the Waffle Flower Color Swatches Combo to make swatches of my colouring mediums. I always do my swatches on the card that I would use when using that colouring medium.
Copic-friendly cards and inks
To get the best out of the Copic markers, you need to use the right card. The ink absorption of the card needs to be optimal in order for easy ink blending. Based on my research, there are two cards that work best with alcohol markers, including Copic markers and they are X-Press It Blending card and Spectrum Noir Ultra Smooth Premium White cardstock.
Use the correct ink to ensure no bleeding with Copic markers. The two inks that I use are Altenew Permanent Black Crisp Dye Ink and Memento Tuxedo Black ink. These inks gives a crips image and dries fast.
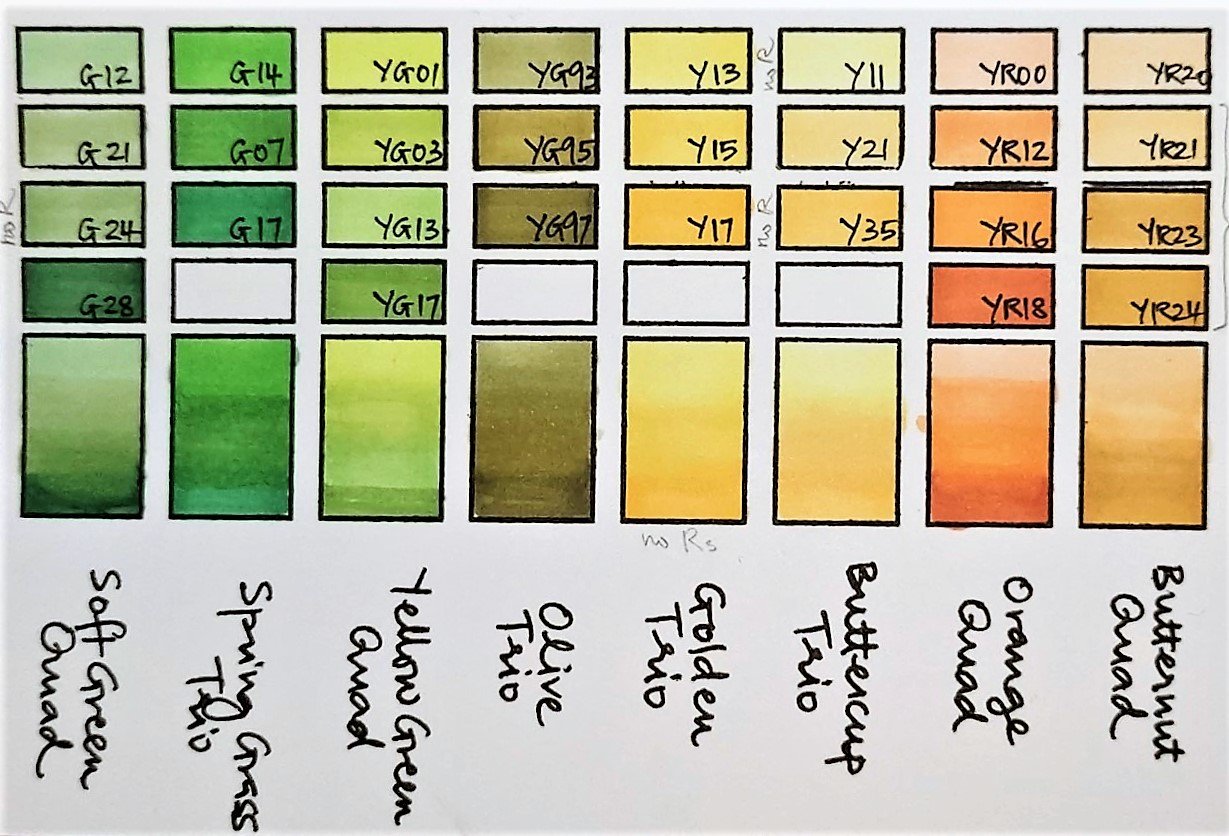
Copic Colour Combinations
Colour Combos that I have collated from research on the Net:
Green (G) – (1) G12, G21, G24, G28; (2) G14, G07, G17
Yellow Green (YG) – (1) YG01, YG03, YG13, YG17; (2) YG93, YG95, YG97
Yellow (Y) – (1) Y13, Y15, Y17; (2) Y11, Y21, Y35
Yellow Red (YR) – (1) YR00, YR12, YR16, YR18; (2) YR20, YR21, YR23, YR24
Blue (B) – (1) B91, B95, B97; (2) B32, B34, B37, B39; (3) B000, B21, B23, B26
Blue Green (BG) – (1) BG000, BG10, BG05; (2) BG11, BG72, BG78

Red (R) – (1) R81, R83, R85, R87; (2) R20, R24, R29, R39
Red Violet (RV) – RV00, RV10, RV11, RV13; (2) RV91, RV93, RV95; (3) RV63, RV66, RV69; (4) RV10, RV13, RV14, RV17
Violet (V) – (1) V01, V12, V15, V17
Blue Violet (BV) – (1) BV000, BV02, BV04, BV08; (2) BV11, BV13, BV17
Earth (E) – (1) E0000, E01, E02, E30; (2) E40, E41, E42, E43; (3) E50, E51, E53; (3) E50, E51, E53; (4) E31, E33, E35, E37; (5) E21, E23, E25, E29; (6) E97, E08, E19
Copic Marker Storage
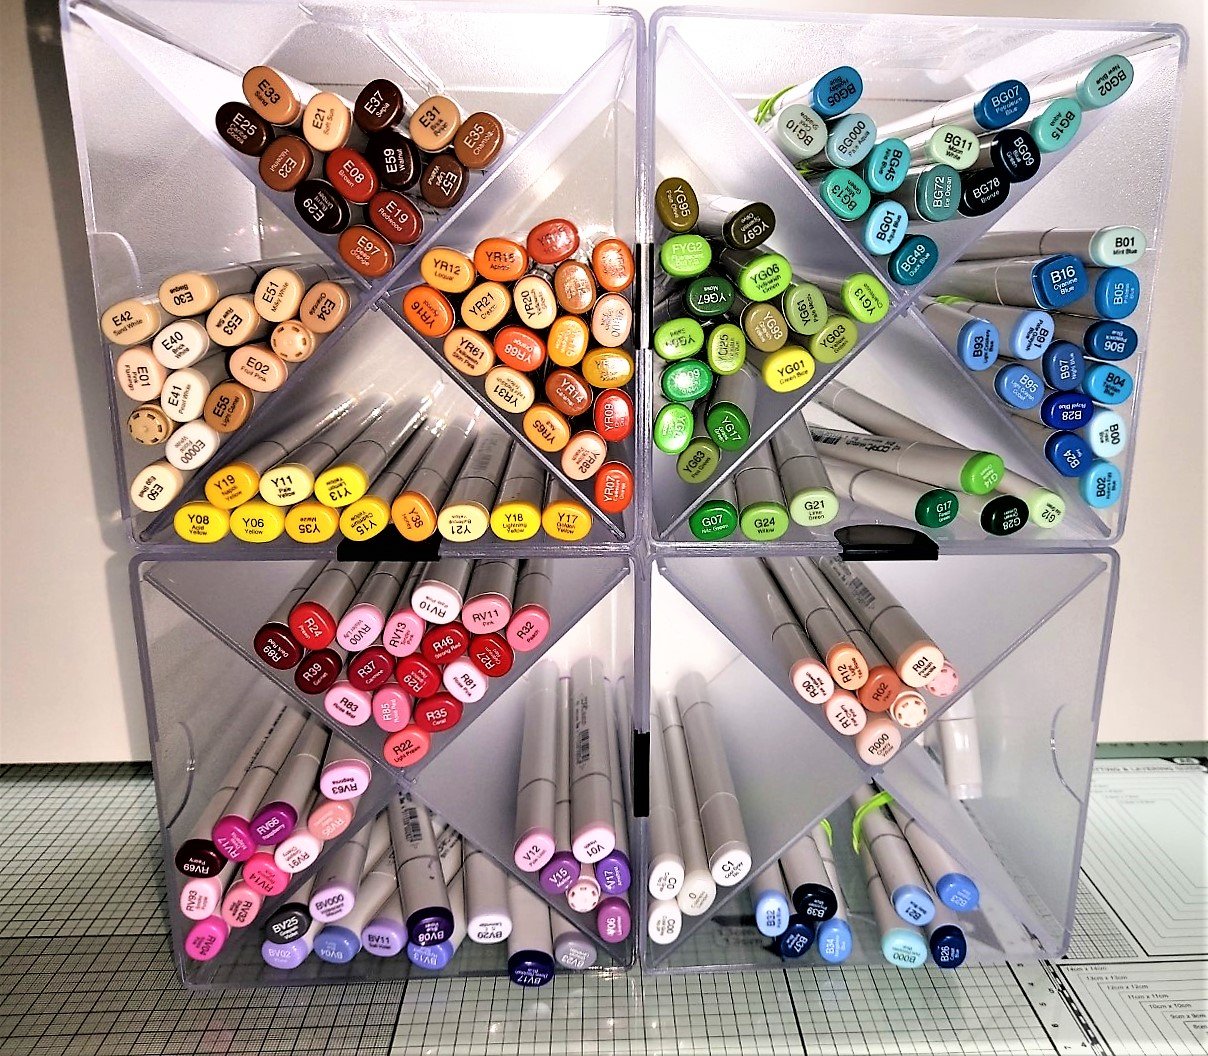
Copic markers should be stored horizontally. I store my Copic colours in groups of colour family such as Blue (B), Blue-Green (BG), Violet (V), Blue-Violet (BV), Red (R), Red-Violet (RV), Yellow (Y), Yellow-Red (YR), Green (G), Yellow-Green (YG), and Earth (E). Deflecto cubes that can be stacked together are used to store my Copic markers horizontally.
Copic Refill Storage
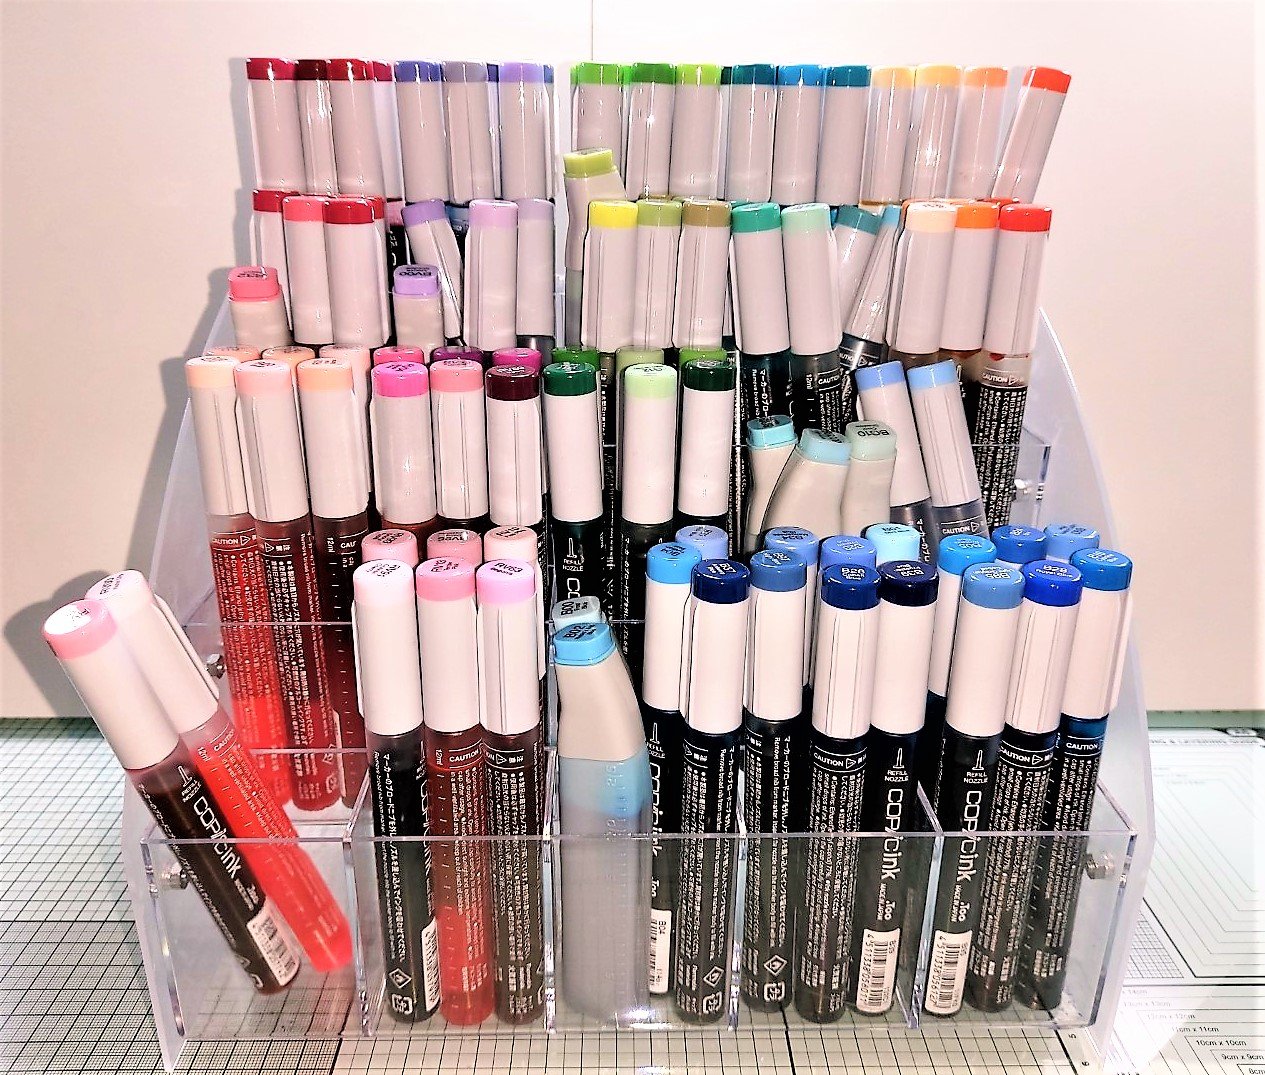
Copic marker refills can be stored vertically and I store them in a stationery organiser.
Copic Colouring
It’s easy to choose Copic colour combinations with clear and well documented and compiled swatches. I stamped the Spellbinders Jan 2022 Clear Stamp of the Month heart stamps with Altenew Permanent Black Crisp Dye Ink and Memento Tuxedo Black ink on X-Press It Blending card and Spectrum Noir Ultra Smooth Premium White cardstock.
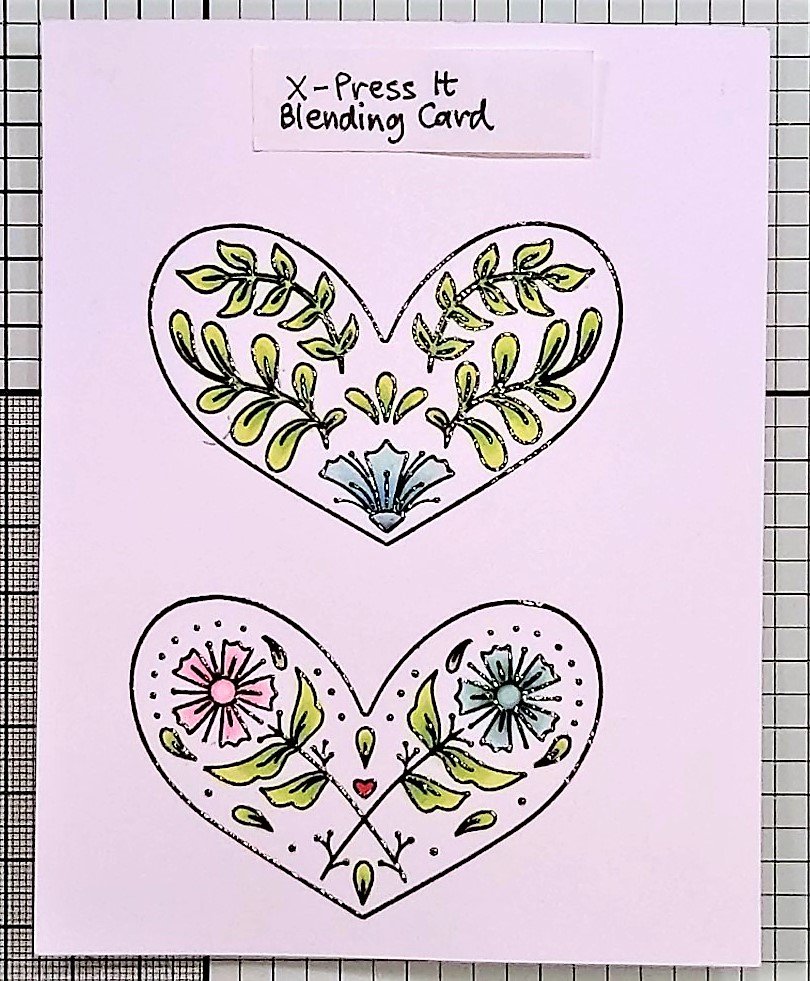

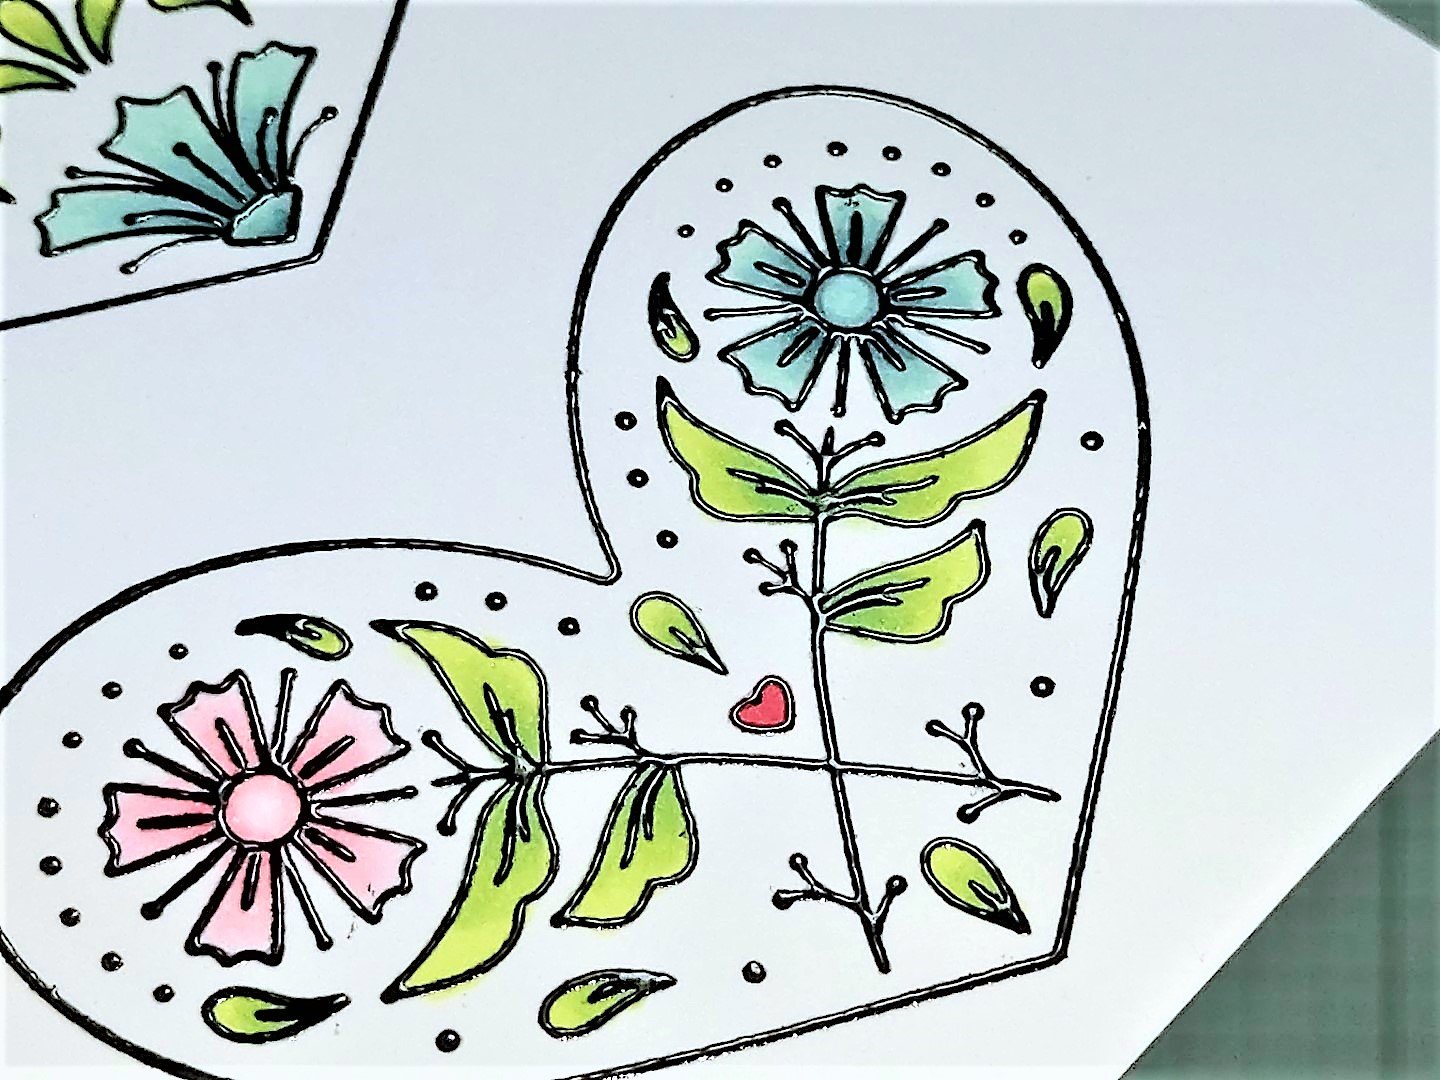
Stamp image with Altenew Permanent Black Crisp Dye Ink on X-Press It Blending card and colour with Copic markers.
Copic markers used: Green (YG01, YG03, YG13), Pink (RV00, RV10, RV11, RV13), Teal (BG11, BG72, BG78), and the red heart R24.
Cover image with anti-static powder, stamp with Versafine Onyx Black ink, sprinkle with Ranger Super Fine Clear Embossing Powder and melt embossing powder with WOW Dual Speed Heat Tool.
To achieve the re-stamping of the images, leave the stamps in the same position in your stamping platform.
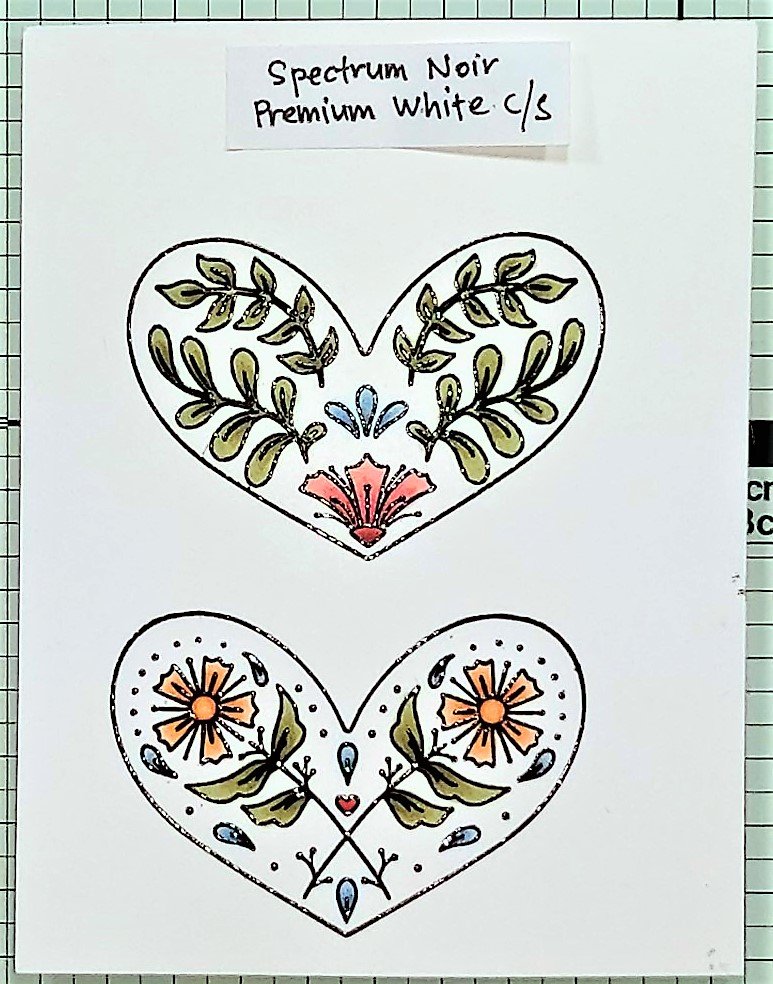

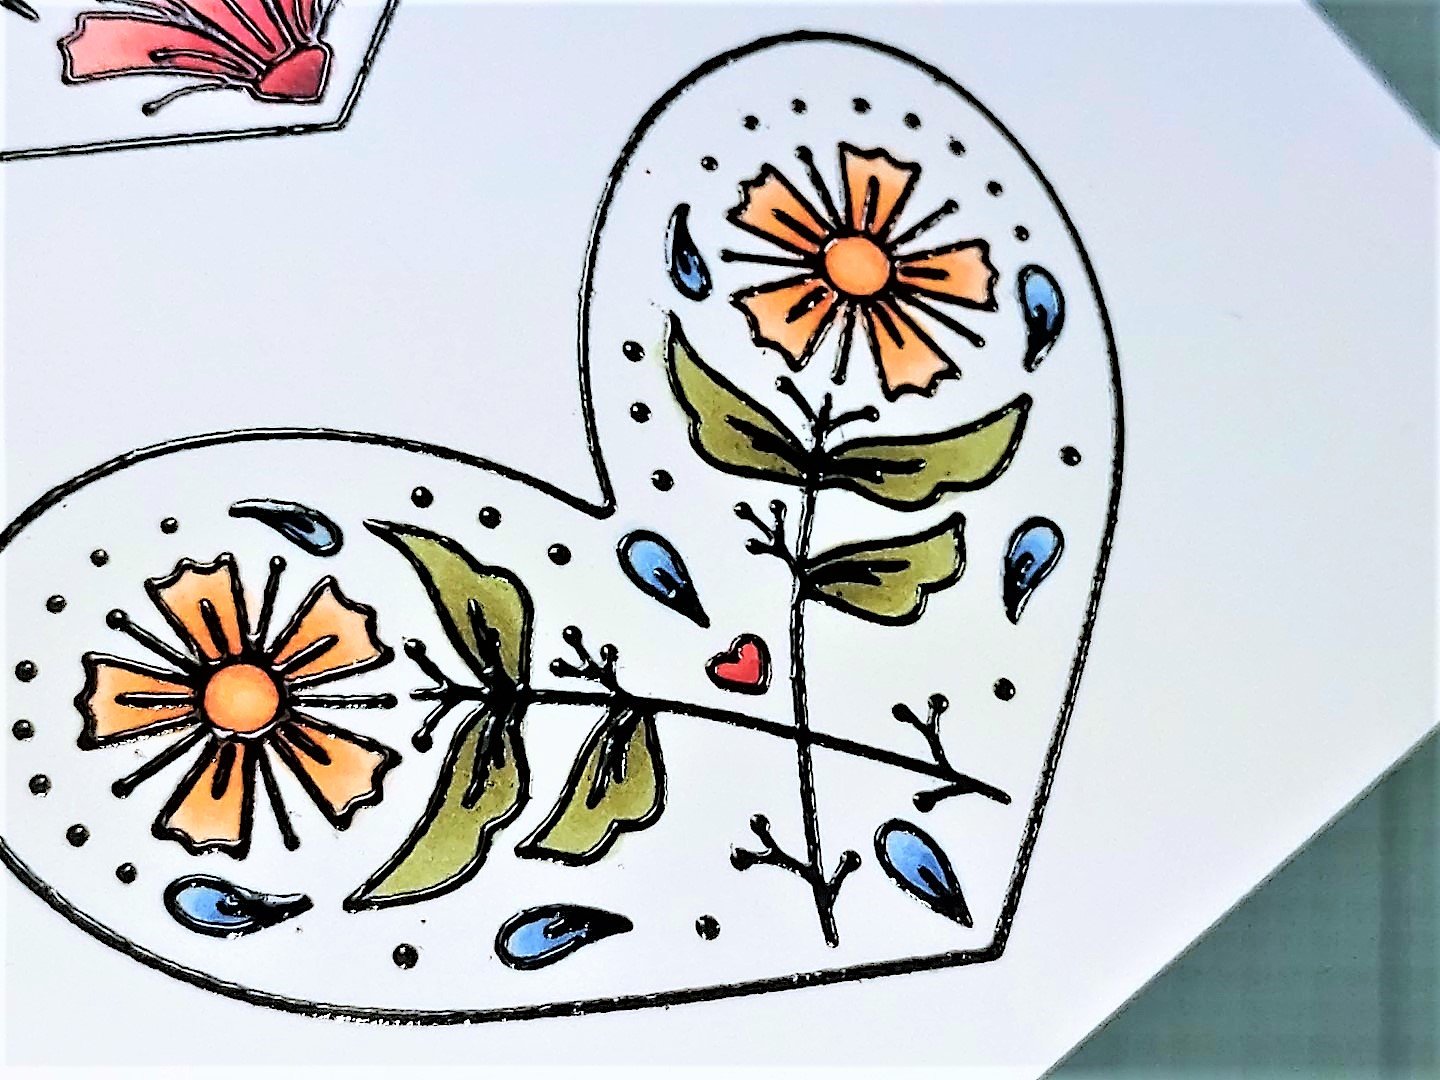
Stamp image with Memento Tuxedo Black ink on Spectrum Noir Ultra Smooth Premium White cardstock and colour with Copic markers.
Copic markers used: Green (YG93, YG95, YG97), Blue (B91, B95, B97), Red (R20, R24, R29, R39), Orange (YR00, YR12, YR16, YR18), and the red heart R24 and R29.
Cover image with anti-static powder, stamp with Altenew Obsidian Black Pigment Ink, sprinkle with Ranger Super Fine Clear Embossing Powder and melt embossing powder with WOW Dual Speed Heat Tool.
To achieve the re-stamping of the images, leave the stamps in the same position in your stamping platform.
Thank you for stopping by and do leave a comment if you have a query or if you just want to say hi. Have a lovely day.